Archive | July 2012

A Trip to Bridlington and Bridlington Priory

Having fun at the Seaside

This weekend I went with my husband, sister and her boyfriend and a couple of other friends to the seaside town of Bridlington in East Yorkshire.  My husbands parents rent a seaside flat there and we took advantage of a free weekend to head to the beach.  After a very rainy drive over there the weekend turned out to be sunny and warm for a change.  The flat is lovely and the front room overlooks the sandy beaches and with the windows open you can hear the calming sounds of the waves breaking along the beach.

The Beach

It really felt like we were on holiday and it was a proper stress free weekend.  We went out for drinks, fish and chips, walked around the town and visited some amazing antique and second hand shops up in the old town.  Down by the harbor some of us went for a speed boat ride and all the boys had a go on the roller coaster – Mad Mouse!  All nicely rounded off by a cold cider in the pub.

One of the places we visited was Bridlington Priory.  The priory was founded around 1113AD by Walter de Gant.  The monastery was one of the earliest and largest Augustinian houses in the country and was very wealthy.

Founding the Priory

In the time of Henry VIII came the Dissolution of the Monasteries, where Henry broke with the Catholic Church and established himself as the Supreme Head of the Church of England.  Many of the religious houses in Britain, such as monasteries and abbeys, were closed down including Bridlington Priory which was dissolved in 1537.

Panel Showing the Dissolution of the Priory

 Very quickly, within a few years, most of the once great building had been destroyed, with a lot of the stone going to build the harbor in the town. Only the nave survived to serve as the Parish Church which is what you can visit today.

The tapestry

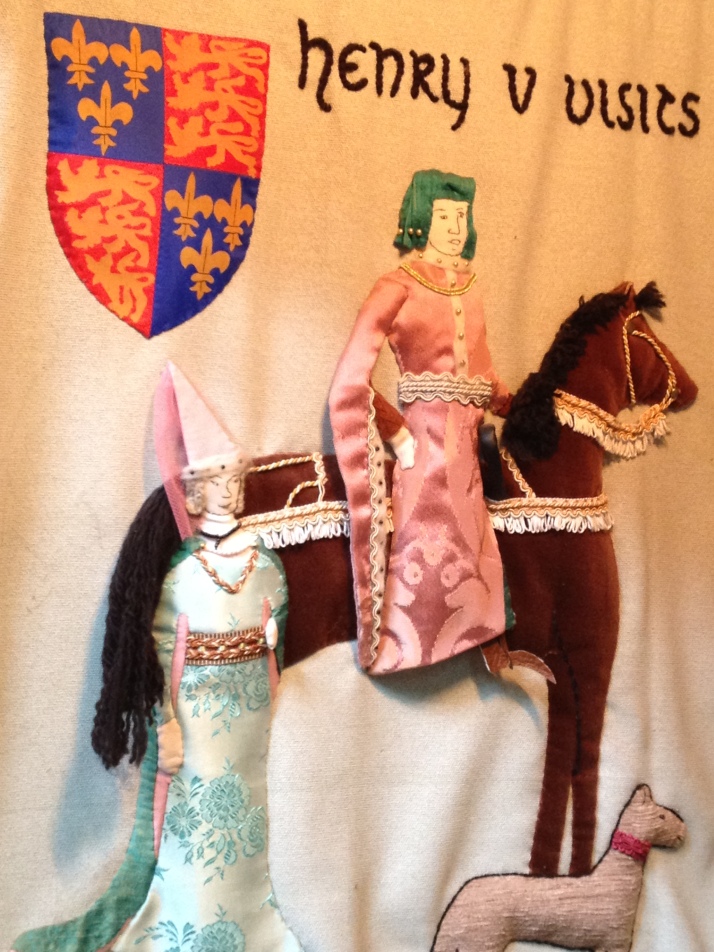
Inside a tapestry has been created that maps the history of the Priory.  It is an amazing piece of art to look at.  In 1994, some ladies at Bridlington Priory decided to make a tapestry depicting the major events in its life.  By Christmas 1995, 12 panels, each 5ft by 4ft were almost complete.

The set of tapestries includes over 140 human figures, each built like a doll, then sewn to the backing.

Detail of a panel

Materials used include: leather, hessian, linen, wool, cord, fleece, velvet, yarn, ribbon, cheesecloth, cellophane, suede, silk, satin, corduroy, milium, fur fabric, lurex, balsa wood, raspberry cane, net, aluminium, and feathers.

Some of the Fabric and ideas used

My Favorite Panel

The Bridlington Priory Website:  http://www.bridlingtonpriory.co.uk

Read a brief overview of the dissolution of the monasteries: http://www.bbc.co.uk/history/british/tudors/reformation_overview_01.shtml

The bridlington website: http://www.bridlington.co.uk

The Sun Shining on the Sea


Everybody loves a Cosy Blanket

With all the wonderful weather we are having in the UK at the moment, there is nothing better than sitting under a nice cosy blanket or quilt, with a warming cup of tea and a good book or a great movie. I love blankets; they can really make your home feel…. homely. If you are in a rental they can make even the ugliest sofa beautiful and they can also become a wonderful heirloom to pass down the generations.

Blankets can be made from anything, knitted or crochet, patchwork, quilted, woven, plaited the possibilities are endless. Blankets of all kinds have such amazing history.
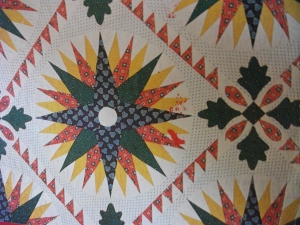
Mariner’s Compass Quilt, Pennsylvania c.1840/1850

Take the American quilts for example. After the War of Independence, American cotton manufacturers found it difficult to compete with European and British imports and textiles were expensive so small scraps were used in geometric shapes to create quilts. By the mid 19th century designing a patchwork quilt had become one of the major forms of domestic folk art. Traditionally an American girl should have up to 12 quilts in her ‘hope chest’ with a 13th being her Bride’s quilt. Quilting blankets became a major social event with ‘Quilting Bee’s’ taking place where pioneer women who lived far apart would meet up (Betterton 1982: 7-8).

Another wonderful type of blanket is the Welsh Quilt or Carthens. All are woven on a Dobby loom, two different pieces of cloth being woven together to form a double cloth. These are heavy blankets weighing over 2 kilos. The most recognisable of Welsh blankets were made across Wales from C18th. Some are still produced at the few surviving Mills such as Rock Mill Capel Dewi , Middle Mill sova and Tregwynt in Pembrokeshire. (http://www.welshblankets.co.uk).

I love making blankets of all kinds and so am sharing a few of my creations here with you so you can see my eclectic love of craft. I will never be able to choose one favourite crafting method, every time I look in a book, read a craft magazine or browse another crafters blog I find a new technique I want to try out and end up loving. Crochet, patchwork, quilting are all methods I love. I am not a great knitter and a blanket would probably take years not days. My next aim is to learn more about weaving. My mum can both spin and weave so I may have to go to her for a few handy tips to start me off.

First to crochet.

My first crochet project

The above blanket was my first ever crochet project. I taught myself so that I could teach a friend. I found it incredibly difficult as I am left handed and therefore have to reverse all of the instructions you find in books. The left handed crafter is definitely at a disadvantage when it comes to craft books and guides. This blanket I started and just kept adding to it and ended up with a huge double blanket but I was so happy with it and it now has pride of place on my sofa.
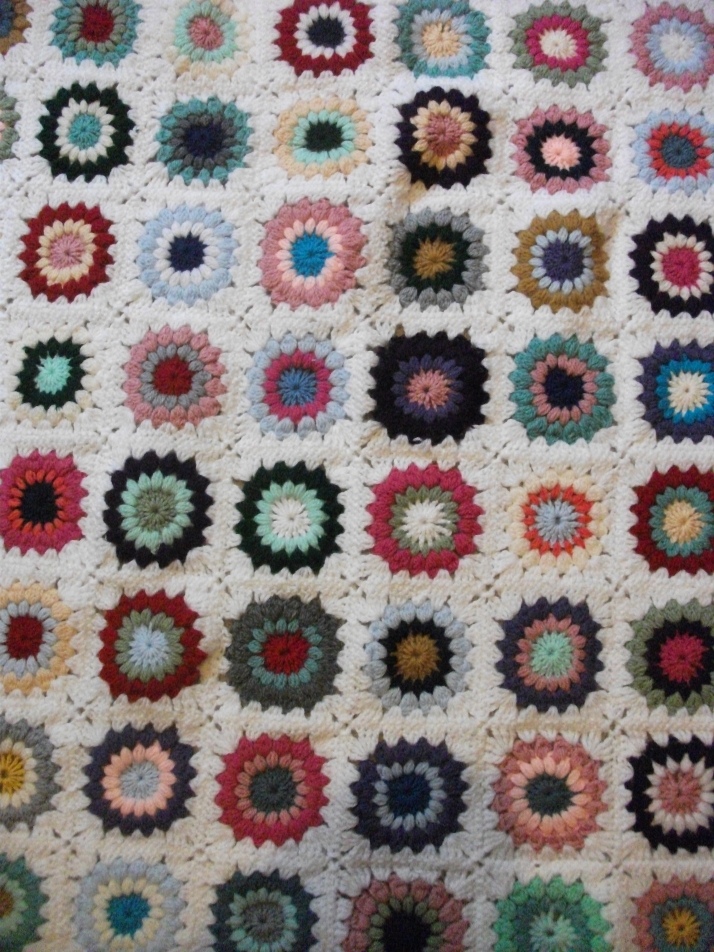
The current crochet blanket project

This second one is still a work in progress. I found it in a magazine and loved the pattern so much that I decided to make it. It is great as you can use all your wool odds and ends as no two squares have to be the same so very economical!
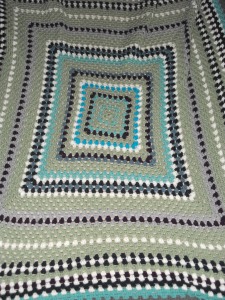
A crochet Present

Third is a blanket I made my parents for Christmas, I love the colours together.

Patchwork.
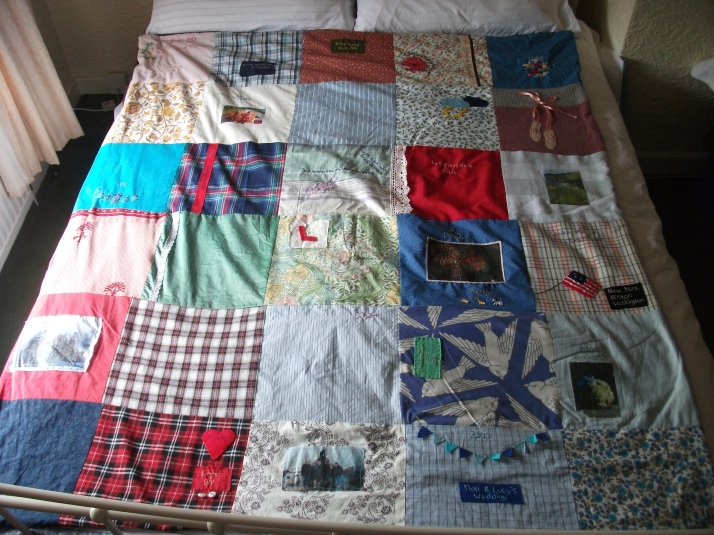
A Personal Memory Blanket

This is one of my favourite blankets I have ever made. I made it in January this year for my sister Emma’s 30th birthday. The idea is that of a memory quilt. I cut out 30 squares of different fabrics, some with meaning such as the tartan of our school kilt, some of Emma’s old clothes and some of my grans fabrics and then embellished them.
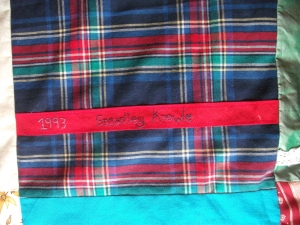
Our school kilt tartan

Some square have embroidery with significant words, dates and occasions.

Embroidered Personal Details

Others have photographs printed on or appliqué.

Felt Storm Clouds and Ballet Shoes

I left a few plain as I didn’t want to overload it. It is a warm blanket as inside is a layer of wadding and it is backed in a plum coloured cotton. It fits a double bed so pretty large but I wanted it to make an impact when I gave it to her.

Quiting.
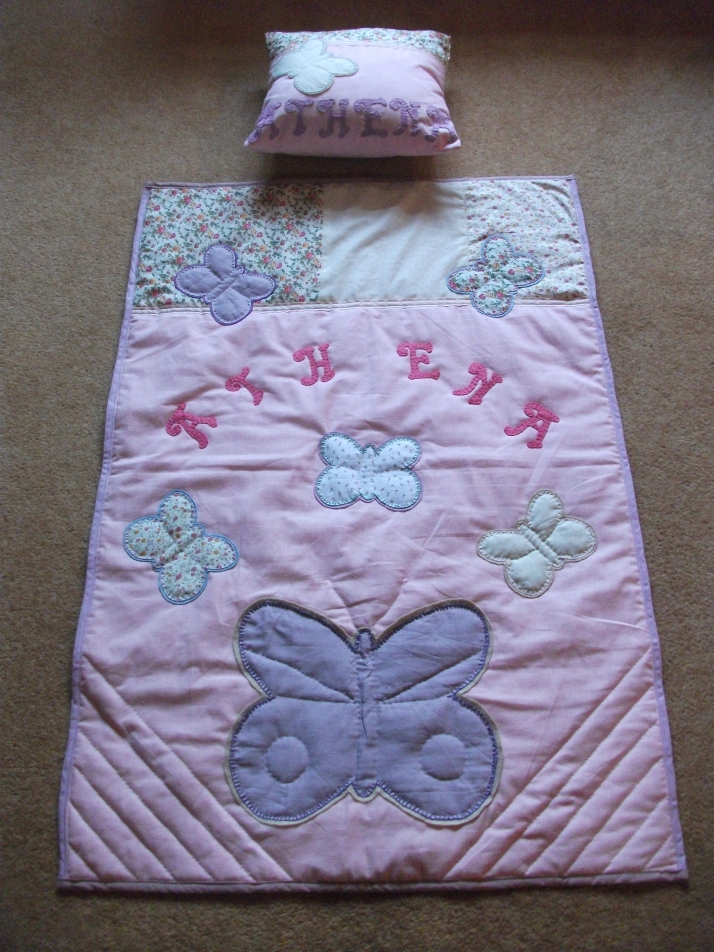
Personalised Quilted Blanket

This blanket I was commissioned to do as a present for a baby. Both the pillow and the quilt are personalised with the little girl’s name. The client said that I could design the blanket myself with anything the only instructions being that it had to be pink and girly, hope fully the finished blanket achieved this. I loved doing this project, I think creating something with a personal touch that you know someone will treasure is such a wonderful thing for a crafter or artist.

Has anyone else made a blanket or quilt? What is your favourite crafty method? Let me know your latest blanket project.

If you are interested in commissioning a blanket please feel free to contact me to discuss it further, I am always happy to hear from you.

A few References

Betterton, S 1982 Quilts and Coverlets London:L Butler & Tanner Ltd

Kort, E 2008 Wisconsin Quilts: History in the Stitches Krause

A wonderful website and business about Welsh blankets run by Jane beck. Although not a weaver herself, she is interested in the social history associated with the industry, there is so much information on the website so take a look. http://www.welshblankets.co.uk

An interesting little article about the Whitney Blanket http://www.bbc.co.uk/ahistoryoftheworld/objects/g_IeloABTraJ_FvU0m1elg

How to make a photo frame jewellery display

This is a great way to display some of your jewellery. It is so simple and easy to do and looks beautiful with your earrings and brooches hanging off it. It took me about 1 hour to make this small one but if it is your first go just take your time and have fun. They make really nice presents as well.
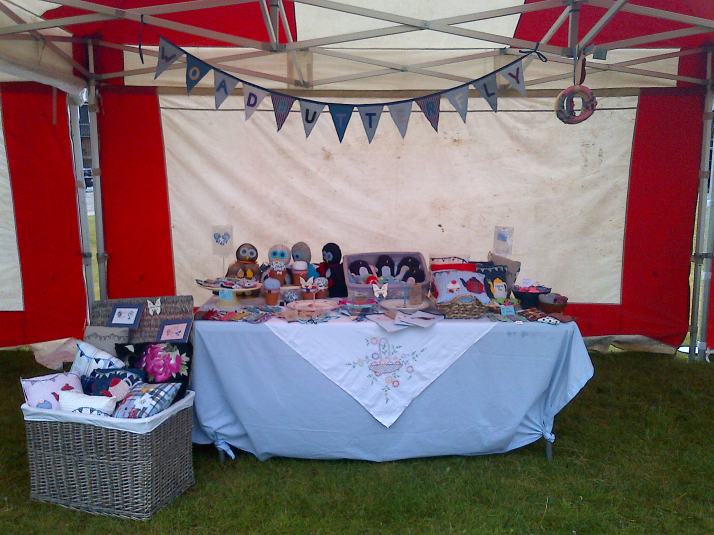
You will need:

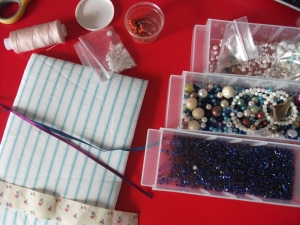
What you will need

• A photo frame of your choice, make sure that you can remove the glass as you don’t need this and sometimes the glass is glued to the frame which you don’t want. Always be careful when handling glass and dispose of it or use it responsibly.

• Polyester or cotton wadding – enough to cover the frame with about an inch on all sides (see instruction 2 below)

• Cotton or fabric of your choice the same size as the wadding

• Ribbons, buttons, beads and trimmings etc

• Cotton thread

• Needle

• Pencil

• Thick card

• Scissors (and pinking shears if you have them)

1: To start, remove the back of the frame and take out the glass.

Draw around the photo frame backing onto your card

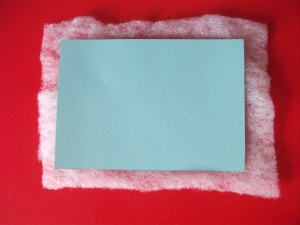
2: Place the frame back on your card and draw around it so that when you cut it out is fits into your frame. Then cut about ½ cm smaller on one length and one width so that it is now slightly smaller than the frame back.

3: Use the card to measure the wadding and the fabric (remember to cut them both about an inch wider than the card on all sides). I used pinking shears to cut the fabric so that it won’t fray.

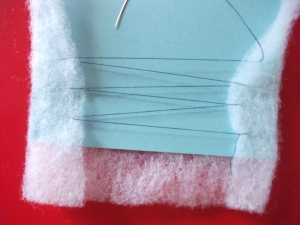
4: Place this card on top of your measured wadding making sure it is central. Then using your needle and thread secure it to one side of the wadding and proceed to sew through alternative sides of the wadding like a corset so that it fits snuggly around the card. I normally start with the width as it is the longest side. Make sure the card stays flat as you don’t want it to warp, so don’t pull the thread too tight, keep the tension nice and even. Do this all the way to the bottom, then knot and secure your thread and cut it.

Sew the wadding on either side in a zig zag pattern around the card

Continue sewing all the way from top to bottom

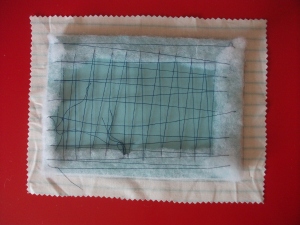
5: Do this exactly the same length ways. You should end up with your card wrapped in the wadding, nice and flat on the front and with lots of cross over stitching on the back. It doesn’t have to be overly neat as no one will see the back just make sure it is secure. Put it into the frame to make sure it fits. We cut the card slightly smaller than the frame to allow space for the wadding.

Sew the wadding tightly and smoothly both length ways and width ways

Place the wadding wrapped card smooth side down onto the wrong side of your cut out fabric

6: Do exactly the same with the fabric. Place the wadding wrapped card on top of the fabric in the centre and proceed to sew in the sides in the same way as you did with the wadding, crossing over like a corset (instruction 5).

The back with both the wadding and the fabric

7: When it is secure, turn it over and it should have a nice padded flat front. Place this into the frame again to make sure that it still fits with no bends in the card, if there are you have sewn too tightly and you may have to undo and start again.

Pick your decorations

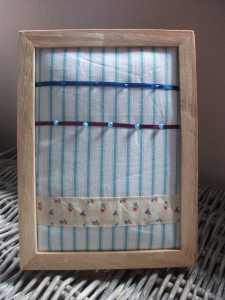
8: Now we can decorate. Use any ribbon or lace you have and sew it anywhere you like. On mine I have sewn a pretty floral ribbon on the base. At the top I have sewn 2 thin ribbons. They are securely attached on either end but on the front they are only attached where the beads are so that they are loose in between. This way you can hang earrings off of them and the beads give it nice decoration.

Place and sew your decorations

Attach thin ribbon with beads, leaving the ribbon loose between them

9: Once you are happy with the decoration put the finished card into the frame and put the back of the frame into place and secure it. Turn it around and there you have your very own photo frame jewellery display. You can now have it standing on its stand if it has one or hang it on your wall.

You can make these in any size you like. I have some big ones that I use for display at my fairs and to photograph my brooches I make. Just have fun and experiment.

Little and Large displays

Ordsall Hall Summer Garden Party

This past weekend on 1st July I was at the Summer Garden Party held at the beautiful Ordsall Hall in Salford. I found out about this event from the blog site http://www.collettecostello.co.uk


The last time I went to visit Ordsall was in 2009 just before they closed it for refurbishment; it opened again May last year (2011). This Garden party was held for the first time last year and so this year I decided to apply for a stall and luckily got a place.

Typically, when I woke up in the morning it was tipping it down with rain. I swear I have a weather curse when it comes to attending fairs. My first ever craft fair back in February was the one day it snowed, and nearly every other one so far this year, it has rained, but I was not to be put off.
When I got there at 11am it was spitting and really windy but we all set up regardless, unsure of whether anyone would turn up. As we were getting our stalls ready, I heard the strange sound of bleating sheep coming from somewhere, not the normal sounds of Salford. They were setting up a pen with sheep, goats, pigs, chickens and ducks for kids to come and see and handle so hopefully with all the different attractions it would be good.
There were about 10 craft stalls selling a range of products from glass to photographs and knitted items. There was a great array of different crafts and no two were the same so as the visitors walked around they would have a brilliant choice of products to buy.

Some of the stalls at the fair

I was really happy with my stall and I think it was my best lay out to date. I recently brought a large wicker basket to keep my fabric in and decided that I would bring it to put my cushions in and it worked brilliantly. It got them off the table where they normally take up a lot of room.

My new wicker basket

My Stall

The fair opened at 12pm and the first few people trickled in. As the day got going a lot of people came through and it turned into a really great day. The weather still wasn’t brilliant and it was freezing stood still but it was worth it. It was great to talk to lots of different people and I got loads of lovely comments about my work. The first thing to go was one of my embroidered needle cases which I had only finished the day before. My owl doorstops were also a great seller.

My new hand embroidered needle cases

There were people working for the hall dressed in Tudor costume wandering about with buckets collecting donations towards the hall, people selling strawberries and cream, homemade chilli and a tent showing you how to make little wands with willow. Inside the hall was a brass band which we could hear from outside and lots of events for the children to enjoy. As expected the sun came out as we were packing up but it finished off an enjoyable day rather nicely.

A little bit of history for you.


Ordsall Hall is a Grade 1 listed historic house in Salford, Lancashire. It dates back over 820 years, the oldest parts still surviving today date back to around the 15th century. It is one of only 8 comparable grade 1 listed timber framed buildings in Lancashire and is one of the finest records of construction techniques and materials of its kind in the North West of England.

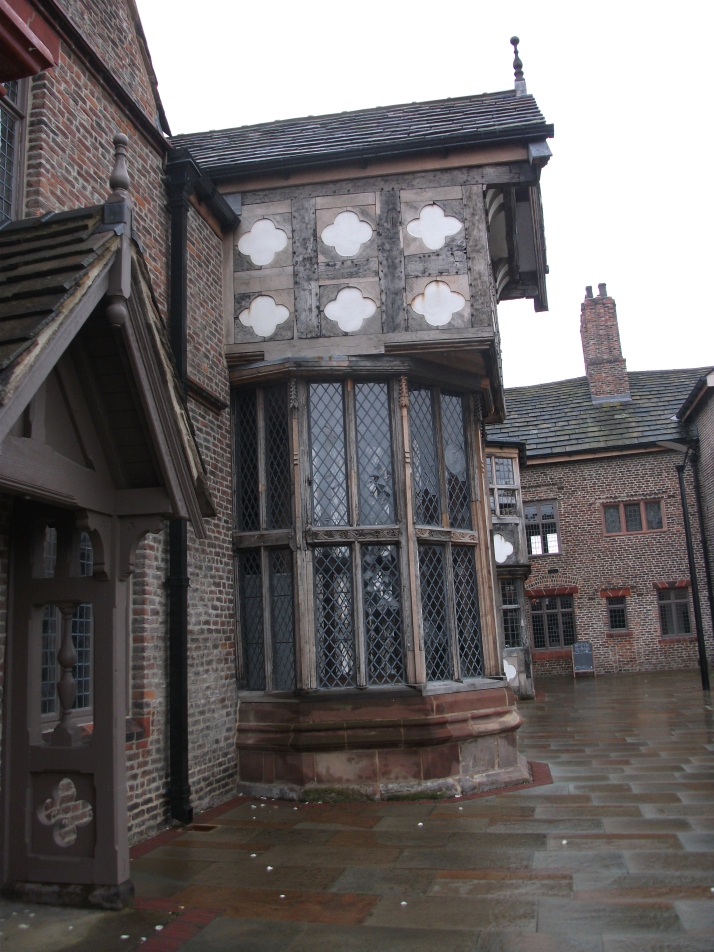
The Great Hall Window

Today I went back to get a few more photos for this blog and luckily I was the only visitor there and got a guided tour of the house by one of the fabulous volunteers. It was truly fascinating and you can even go up into the roof space which you couldn’t before and see all the wood work and timber frame construction. It was first the family seat of the Radclyffe family for over 300 years and when they sold it in 1662 it has since been a working men’s club and a church hall among other things. The building was brought by Salford City Council in 1959, and opened to the public in 1972, as a local museum. They have done an amazing job since I was last at the hall and hopefully they get lots more visitors through the doors, I definitely recommend it and it is free entry.

Door detail showing the old and the new

If you want to find out a bit more about Ordsall have a look at these sites:

• The official Salford Council website: http://www.salford.gov.uk/ordsallhall 
• A brief history: http://en.wikipedia.org/wiki/Ordsall_Hall 
• Textile artist Rosie James was commissioned by Salford City Council to create a textile artwork to hang in the Great Hall. For the Ordsall Tapestry she used machine stitch, screen-printing, appliqued recycled fabrics, digitally printed fabrics and some computerised machine embroidered elements. It incorporates images of the local people of the Ordsall area alongside the historic characters who once lived in the hall. It is a wonderful piece: http://www.salford.gov.uk/rosie-james
• You can even go on a ghost hunt at Ordsall hall: http://www.hauntedhappenings.co.uk/ghost_hunts/Ordsall_Hall.php